Revel Digital gadget library for Angular
Angular library for building custom Revel Digital gadgets. This library simplies the player/gadget interface making it easier to build full featured gadgets utilizing the Angular framework.
Quickstart
New to Angular? Check out the Angular documentation for getting your environment configured for development.
Step 1. GitHub Repository Creation (Optional)
Not hosting your app on Github? Skip to step #2.
Create a new repository on GitHub.com. For more information, see "Creating a new repository."
Copy your remote repository URL

git remote add origin <REMOTE_URL>
# Sets the new remote
git remote -v
# Verifies the new remote URL
Step 2. Create a new Angular app
From within your working folder, run the following Angular CLI command using the name of your app.
Example :ng new my-app --directory ./
# Generates the boilerplate code for a new Angular appStep 3. Add the Revel Digital libaries
Run the Revel Digital angular schematic which will configure your app for use as a Revel Digital gadget.
Example :ng add @reveldigital/player-client@latest
# Run the Revel Digital Angular schematicStep 4. Build
The build script will generate the Angular app along with a the gadget XML definition file.
Example :npm run build:gadget
# Run the gadget build scriptStep 5. Deploy
The app can be hosted using any number of hosting services, however the provided schematic includes a simplified option for publishing to GitHub Pages.
Assuming your working folder is associated with your GitHub repository, simply run the following command to deploy the app to the gh-pages branch. The gadget app and associated XML file will be publicly visibile and available for use in your signage.
npm run deploy:gadget
# Deploy to GitHub Pages
Sample usage
The majority of the functionality is contained within the PlayerClientService. The service and supporting library exposes the following functionality:
- Methods for obtaining player details such as device time, locale, etc
- Methods for interfacting with the player including sending commands and calling into player scripting
- Player lifecycle methods (ready/start/stop)
- Gadget property accessors such as user preferences
- Miscellaneous helpers such as the SafeStyle pipe
Simply inject this service in your Angular component constructor in order to access the player client interface.
Example : constructor(public client: PlayerClientService) {
this.prefs = client.getPrefs();
this.style = this.prefs.getString('myStylePref');
this.client.onReady$.subscribe((val) => {
console.log(val ? 'Ready' : 'Not ready');
});
this.client.onCommand$.subscribe((cmd) => {
console.log(`onCommand: ${cmd.name}, ${cmd.arg}`);
});
this.client.onStart$.subscribe(() => {
console.log("onStart");
});
this.client.onStop$.subscribe(() => {
console.log("onStop");
});
}Gadget Definition & Preferences
The assets/gadget.yaml file is the definition file for your gadget, responsible for defining the basic properties and features of the gadget as presented to the user. These properties include the gadget name, description, support URL, and preferences. A sample gadgets.yaml file is included in your project after running the schematic.
Preferences are the primary method for providing customization options of your gadget. They allow signage designers to change and preview gadget properties at design time within the Revel Digital CMS.
The following is the sample gadgets.yaml included with the schematic:
# Basic properties of the gadget must include the following:
#   title: Title of the gadget as it will appear in the Revel Digital CMS UX
#   title_url: Optional support URL for the gadget
#   description: Details of the gadget. Will appear within the Revel Digital CMS
#   author: Name of author or organization credited with developing the gadget
#   background: (Deprecated) should always be transparent for most gadgets
#
title: My Gadget
title_url: https://mysupporturl.org
description: Describe the purpose of your gadget here
author: My Organization
background: transparent

# Requirements enable certain features of the gadget. Available options include:
#   reveldigital (core Revel Digital features)
#   offline (Enable service worker caching for offline support)
#   webfont (Enable Google WebFonts for dynamic font loading)
#   moment (Enable the moment library for localized date/time, initialized with device timezone)
#   jquery (Enable the jQuery libary)
#
requirements:
  - reveldigital
  - offline
  - webfont
  - moment
  - jquery

# Locales are use for localization within the gadget definition (XML) itself.
#  Docs for using the Gadget API for i18n are available here: https://developers.google.com/gadgets/docs/i18n
#
# Angular applications should use the i18n support provided by the Angular framework:
#  https://angular.io/guide/i18n-overview
#
locales:
  - messages: https://reveldigital.github.io/reveldigital-gadgets/ALL_ALL.xml

  - lang: fr
    messages: https://reveldigital.github.io/reveldigital-gadgets/ALL_ALL.xml

# Preferences provide customization options for the gadget and are accessible at both design time and runtime.
#
# Propreties of a preference include:
#   name: Unique name or ID for the preference
#   display_name: Name as shown in the UX
#   datatype: string, enum, hidden, bool, style, list
#   default_value: Default value
#   required: Make this prefence mandatory, must have a value
#   multiple: Allows for multiple selection of list items (enum pref type only)
#   multiline: Enables multiline text (string pref type only)
#   depends: The visibility of this preference depends on other preferences. This requires the name
#     of the dependent preference along with a list of values. Condition types can include
#     any_of, all_of, none_of. Nested depends conditions are also supported.
#
prefs:
  - name: myStringPref
    display_name: Sample string preference
    datatype: string
    default_value: test string
    required: true
    multiline: false

  - name: myBoolPref
    display_name: Sample boolean preference
    datatype: bool
    default_value: true
    required: true
    depends:
      - name: myEnumPref
        any_of:
          - values:
            - fast

  - name: myStylePref
    display_name: Sample style preference
    datatype: style
    default_value: font-family:Verdana;color:rgb(255, 255, 255);font-size:18px;
    required: true

  - name: myEnumPref
    display_name: Sample enum preference
    datatype: enum
    default_value: fast
    required: true
    multiple: false
    options:
      - value: fastest
        display_value: Fastest
      - value: fast
        display_value: Fast
      - value: medium
        display_value: Medium

  - name: myListPref
    display_name: Sample list preference
    datatype: list
    default_value: dog|cat
    required: false
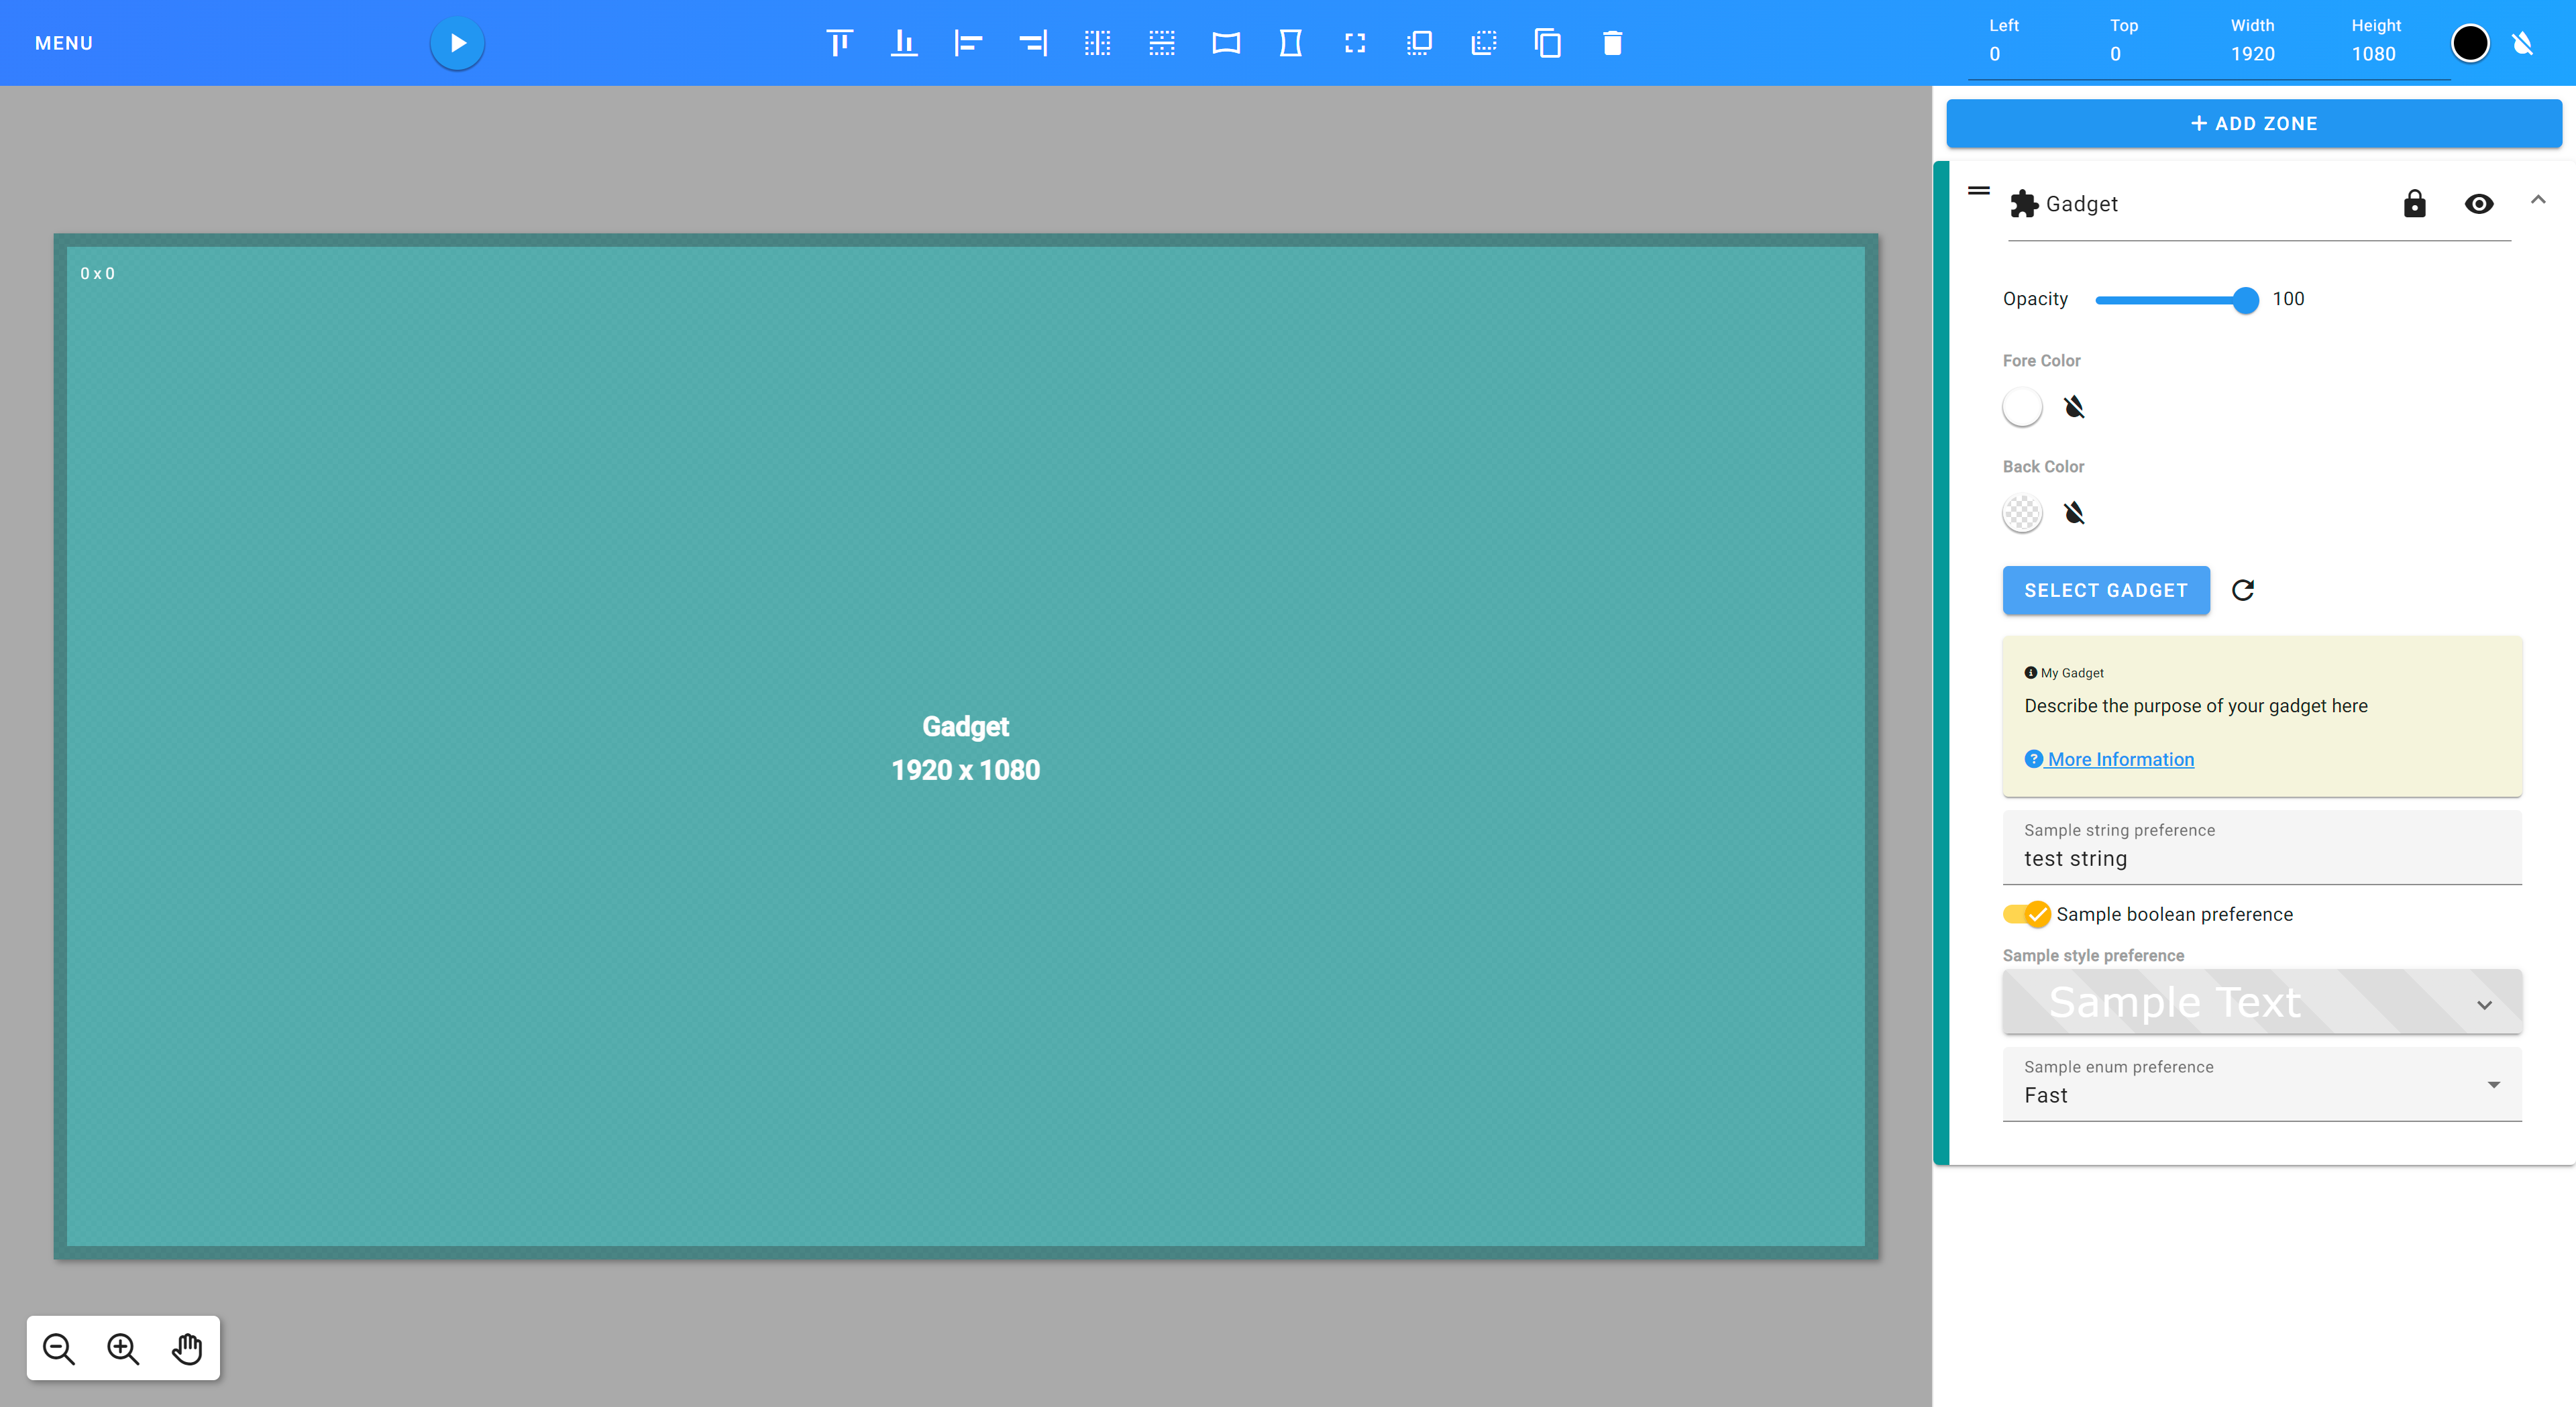
This definition file results in the following user experience when designing your gadget in a template:

You will see the preferences exposed in the editor which can then be modified at design time.
Individual preferences are able to be accessed in your gadget code like so:
Example :this.prefs = client.getPrefs();
this.prefs.getString('myStringPref');
this.prefs.getBool('myBoolPref');
this.prefs.getFloat('myFloatPref');
this.prefs.getInt('myIntPref');
this.prefs.getArray('myListPref');Angular Library Documentation
Library documentation is available here: https://reveldigital.github.io/reveldigital-client-library/
A sample Angular app is available in this repo under https://github.com/RevelDigital/reveldigital-client-library/tree/master/projects/test-app.